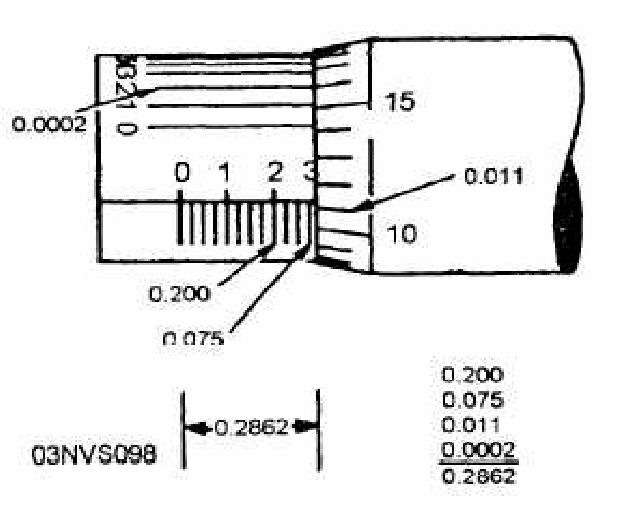
Exceptionally precise dimensions require specialist equipment – a vernier scale or micrometer. A micrometer can measure to a few ten thousandths of an inch or 0.02 mm using a vernier scale a calibrated to the fine thread of a screw. The vernier scale of a micrometer places the fine readings between the lines on the thimble rather than requiring you to estimate the reading. 10 divisions on the vernier are equivalent to 9 divisions on the thimble. Each unit on the vernier scale is equal to 0.02 mm, and the difference between the sizes of the units on each scale is 0.022 mm. When a line on the thimble scale does not coincide with the horizontal reference line on the sleeve, you can determine the additional spaces beyond the readable thimble mark by finding which vernier mark matches up with a line on the thimble scale. Add this number, as that many ten-thousandths of an inch, to the original reading. In the diagram

see how the second line on the vernier scale matches up with a line on the thimble scale. This means that the 0.011 mark on the thimble scale has been advanced an additional 0.0002 beyond the horizontal sleeve line. When YOU add this to the other readings, the reading is 0.200 + 0.075 + 0.011 + 0.0002, or 0.2862, as shown.
